Seiten

Dieses Blog durchsuchen

Posts mit dem Label upcycling werden angezeigt. Alle Posts anzeigen

Dienstag, 15. April 2014

Ex-Männer Shirts -- Ex-guys' shirts

Ja, diese Überschrift ist mit voller Absicht irritierend.

Bei dieser meiner neusten Kreation handelt es sich um zwei viel zu große T-Shirts in Männergröße, die ich in ihrem ursprünglichen Zustand irgendwann mal cool fand und so tatsächlich getragen habe. Im Büro. In der Öffentlichkeit.

Am Anfang waren es zwei billige weiße Shirts, auf die ich Teile von anderen Shirts genäht habe, die mir nicht mehr passten/ Flecken oder Löcher hatten.
------------------------------------------------------------------------------------------------------------
Yes, this headline is designed to be vexing.

This latest creation of mine are two much too large t-shirts, men's size, which I used to think were cool in their original state at some point and which I actually wore like this. In the office. In public.

At first, they were two cheap white tees onto which I sewed parts of other shirts that didn't fit anymore/ had stains or holes.

 
Teile von mir haben nun allerdings beschlossen, dass wir doch ein Mädchen sind und diese T-Shirts nicht mehr wirklich cool sind. Also – man hat ja nichts zu verlieren – schnell mal in die Werkstatt damit. (Die Werkstatt ist auf den Fotos übrigens im Hintergrund zu sehen. Meine Kamera ist kaputt, da musste ich mir mit dem Handy behelfen)
-----------------------------------------------------------------------------------------------------------
Lately, parts of me have decided that we are actually a girl and these t-shirts aren't really cool anymore. So – since there was nothing to lose anyway – off to the workshop they went. (By the way, you can see the workshop in the background of the photos. My camera broke, so I had to use my phone)

 
Für Modell A braucht man nur drei Stücke Gummiband, die man an den Ärmeln und kurz über der Hüfte festnäht (Hierbei ist es wichtig, dass das Shirt ein ordentliches Stück zu lang ist, sonst entsteht kein richtiges „Röckchen“) Ehrlich gesagt hatte ich nicht damit gerechnet, dass das Endergebnis so gut aussieht.
-------------------------------------------------------------------------------------------------------
All you need for Model A is three pieces of elastic strap which you attach to the sleeves and just above the hips (It is essential for the shirt to be a fair bit too long, otherwise there won't be a nice “skirt” part) To be honest, I didn't expect it to look so neat in the end.

 
Modell B ist schon ein bisschen friemeliger, aber grundsätzlich auch einfach. Man schlägt den überschüssigen Stoff auf Hüfthöhe (oder halt auch höher) um und näht ihn innen und außen fest. Außen lässt man die Naht an beiden Enden ein Stück offen, damit man das Band durchziehen kann. Hier habe ich übriggebliebene Streifen Jeans-Stoff benutzt aber mit Schuhriemen würde es bestimmt auch gut aussehen. Die Ärmel sind genauso gemacht wie bei Modell A.
-----------------------------------------------------------------------------------------------------------
Model B is slightly more fiddly but basically just as simple to do. Fold the excess fabric above the hips (or higher even) and sew it inside and out. Leave the seam open a bit on both ends on the outside so you can insert the strap. I used leftover strips of jeans-fabric but it sure would work just as well with shoelaces. The sleeves are done like Model A.

 
An keinem T-Shirt musste ich rumschnibbeln und man könnte die Veränderungen sogar rückgängig machen, würde man wollen.

Und das Beste ist, dass ich gleich zwei Probleme gelöst habe: 1. Ich habe nichts zum Anziehen, 2. Ich habe kein Geld für neue Klamotten.
Jetzt habe ich zwei neue T-Shirts ohne unmittelbar auch nur einen Cent ausgegeben zu haben. Leben ist gut.
----------------------------------------------------------------------------------------------------------
I didn't have to snip anything off on either shirt and the adjustments could be reversed if I chose to do so.

And the best thing is that I solved two problems in one go: 1. I have nothing to wear, 2. I don't have money to buy anything to wear.
Now I have two new t-shirts without imminently spending so much as one cent on them. Life's good.

Donnerstag, 27. März 2014

Leben nach der Suppe -- Life after soup

Neulich in der Küche: Während ich mit meiner Mutter darüber philosophiere, dass man aus Allem was basteln kann, fällt mein Blick auf einen Kochtopf.

Einige Tage später:
------------------------------------------------------------------------------------------------------------
Recently, in the kitchen: While my mum and I philosophise about how you can make something out of everything, I glance at a cooking pot.

Several days later:


Voilà, eine neue Fußbank für vor den Sessel. Aus einem Topf, den seit Jahren keiner mehr benutzt hat und einem Blumenhocker, der „kaputt“ war ist das coolste Möbel geworden, das ich besitze. Man kann da nicht nur die Füße drauf legen, sondern auch ein paar Fernbedienungen und das Buch, was man gerade liest, drin lagern.
--------------------------------------------------------------------------------------------------------------
Voilà, a new footstool to use with my armchair. A pot no-one had used for years and a flower-stool that was “broken” evolved into the coolest piece of furniture I own. It's not just for putting your feet on, it also holds a few remote-controls and the book you're currently reading.

 
Zutaten:
1 Kochtopf mit Deckel
1 Blumenhocker
Dichtungs-Silikon/Acryl oder sehr starker Kleber
Schaumstoff
1 Stoffkreis, 10 cm größer als der Deckel
1 Schuhriemen
Acrylfarbe
--------------------------------------------------------------------------------------------------------------
Ingredients:
1 cooking pot with lid
1 flower-stool
silicone/ acrylic seal or very strong glue
foam padding
1 circle of fabric, 10 cm bigger than the lid
1 shoelace
acrylic paint

 
Zuerst hatte ich Bedenken, ob ich Topf und Hocker überhaupt zusammen bekomme, aber bis jetzt hält Alles ganz gut. Ansonsten hätte ich es auch anschrauben können, was bei dieser Sorte Topf problemlos möglich ist, bei normalen Töpfen aber nicht zu empfehlen. (Es würde explodieren)
Wenn ich jetzt nur noch die Füllung für den Deckel etwas runder hinbekomme, bin ich zufrieden.

Es gibt auch schon eine zweite Version, ohne Beine und mit einem alten Sofakissen als Füllung. Meine Füße stehen gerade drauf und probieren aus.
--------------------------------------------------------------------------------------------------------------
At first, I had doubts if I could make pot and stool stick together but they're holding up pretty well. I could have bolted them together, otherwise, which is no problem with this kind of pot but not recommended with the normal sort. (It would explode)
Now, if I can make the stuffing on the lid slightly rounder, I will be content.

There is also a second version with no legs and an old sofa cushion for stuffing. My feet are just standing on it and trying it out.

Samstag, 8. Februar 2014

Immer, wenn ich Möbel brauche ... - Whenever I need furniture ...


Hi!

Ich bin die Julia und das hier ist mein erster Blog-Post in meinem Leben.

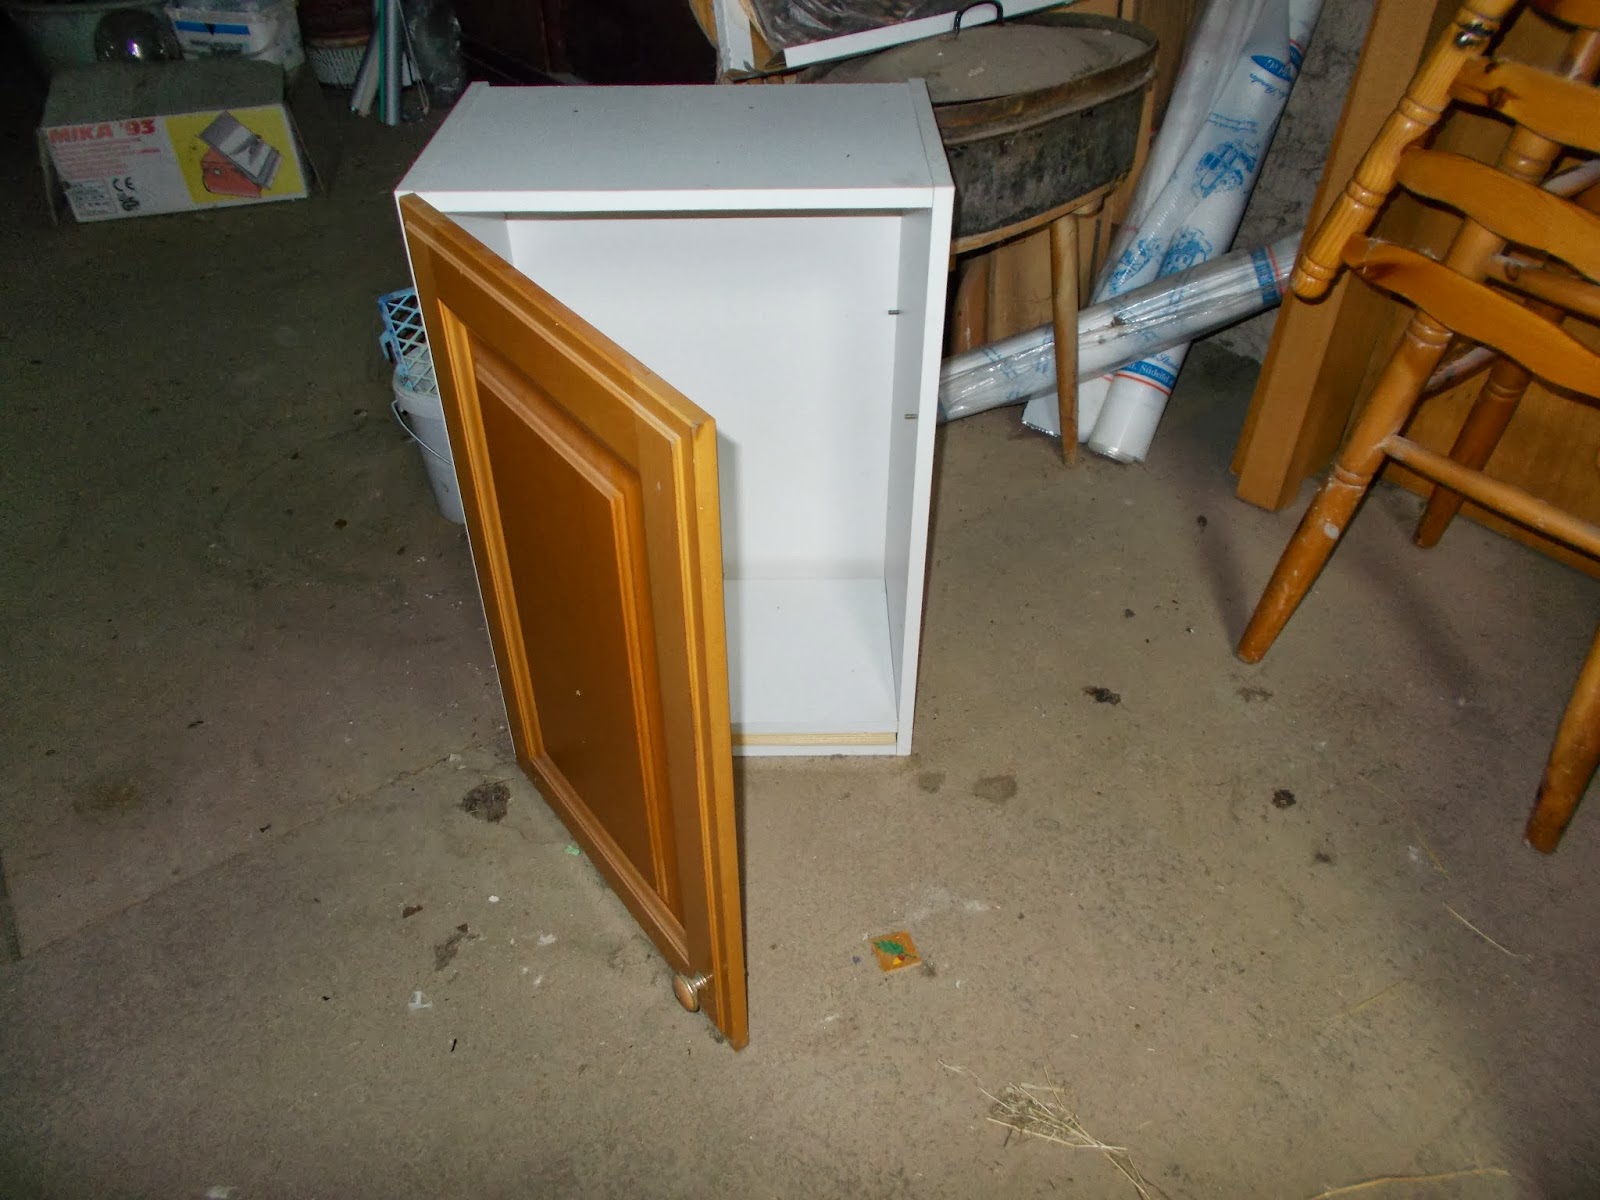
Heute zeige ich euch, wie man aus einem langweiligen Hängeschrank ohne viel Aufwand eine von diesen modernen „Shabby-Chic“ Kommoden bauen kann.

  1. Überlegen, wofür man den Schrank braucht. Meiner ist für CDs (viele), also brauche ich mehrere Fächer, die nicht besonders hoch sind. Beim Planen und Rechnen unbedingt daran denken, wie dick die Regalbretter nachher sind.
  2. Einen Schrank, den niemand mehr braucht, in der passenden Größe suchen. Zum Glück steht sowas bei uns zuhause herum.
  3. Alle Teile, die eine andere Farbe bekommen – in diesem Fall nur die Tür – abmontieren, abschmirgeln und lackieren. Sollte die Tür einen Griff an der falschen Stelle haben, diesen vorher entfernen und das Loch mit einem Holzdübel verschließen.
  4. Vier gleich große Holzkugeln mit Loch besorgen und lackieren.
  5. Drei Holzplatten so zurechtschneiden, dass sie größer sind als der Deckel des Schranks. Eine Platte ein paar Zentimeter größer lassen als die Anderen. Diese größere Platte zwischen die Anderen „sandwichen“ und Alles zusammenleimen. Dann lackieren.
  6. Für die Fächer ein paar Regalböden zurechtschneiden, diese wenn nötig auch lackieren.
  7. An dieser Stelle stellte ich fest, dass ich nicht daran gedacht hatte, wie dick die Regalbretter sind. Deswegen waren die vorhandenen Löcher im Inneren des Schranks, in die man die Befestigung steckt, plötzlich sinnlos und mein ganzer schöner Plan fiel auseinander. Meine spontane Lösung: Stücke von einer Latte in der richtigen Höhe an die Innenwände nageln.
  8. Die Holzkugeln unter den Schrank schrauben.
  9. Die drei geleimten Platten mittig auf den Deckel des Schranks nageln. (Natürlich geht es auch mit Schrauben – das wäre zudem stabiler. Aber Nägel machen eher einen „alten“ Eindruck)
  10. Regalbretter einlegen (hier stellt sich heraus, ob man die Latten an die richtige Stelle genagelt hat), Tür wieder montieren, neuen Griff befestigen, CDs einräumen und Werk bewundern lassen.

So, ich hoffe das war verständlich.

Viele Grüße!

Julia
--------------------------------------------------------------------------------------------------------------
 
Hi!

I'm Julia and this is my first blog-post. Ever.

Today, I will show you how to transform a boring kitchen cupboard into one of those modern “shabby-chic” cabinets without a lot of effort.

  1. Decide what you need the cupboard for. Mine is for CDs (lots of), so I need several low-ish compartments. When planning and calculating these out, it is essential to consider how thick the boards for the shelves will be, later on.
  2. Find a discarded cupboard that's the right size. Luckily, things like these lie around our house.
  3. Dismount all parts that will be painted – in this case only the door – sand down and varnish. If the door has a handle in the wrong place, take this off beforehand and close the hole with a wooden plug.
  4. Find four equally-sized wooden balls with holes and varnish them.
  5. Cut three boards to be bigger than the top of the cupboard. Leave one board a few centimetres bigger than the others. “Sandwich” this bigger board between the others and glue them together. Then varnish this also.
  6. Cut out some shelves to fit and varnish these also, if necessary.
  7. At this point, I realized that I hadn't considered how thick the boards for the shelves were. So, the already existing holes inside the cupboard to hang them up were rendered useless and my nice little plan blew up. My spontaneous solution: Nailing pieces of a latch (I hope that's the right word) to the inside walls in appropriate places.
  8. Screw the wooden balls under the cupboard.
  9. Place the board-sandwich from no. 5 centrically on the top of the cupboard and nail it down. (Of course you could use screws, which would also be more solid, but nails give it this nice “old” look)
  10. Put in the shelves (this is where you find out, if the latches are in the right places), re-mount the door, attach the new handle, put in the CDs and have your work admired.

Alright, I hope this was comprehensible.

Kindest regards!

Julia